Powered by GPT Image 2.5

Image to Image AI Generator

Transform a photo or sketch with image to image AI, also known as Image2Image or img2img. Describe what to change while keeping the parts you already like, without starting from a blank canvas.

Reference images

0/2

Quick edits

Start with a case

Image to Image AI Examples

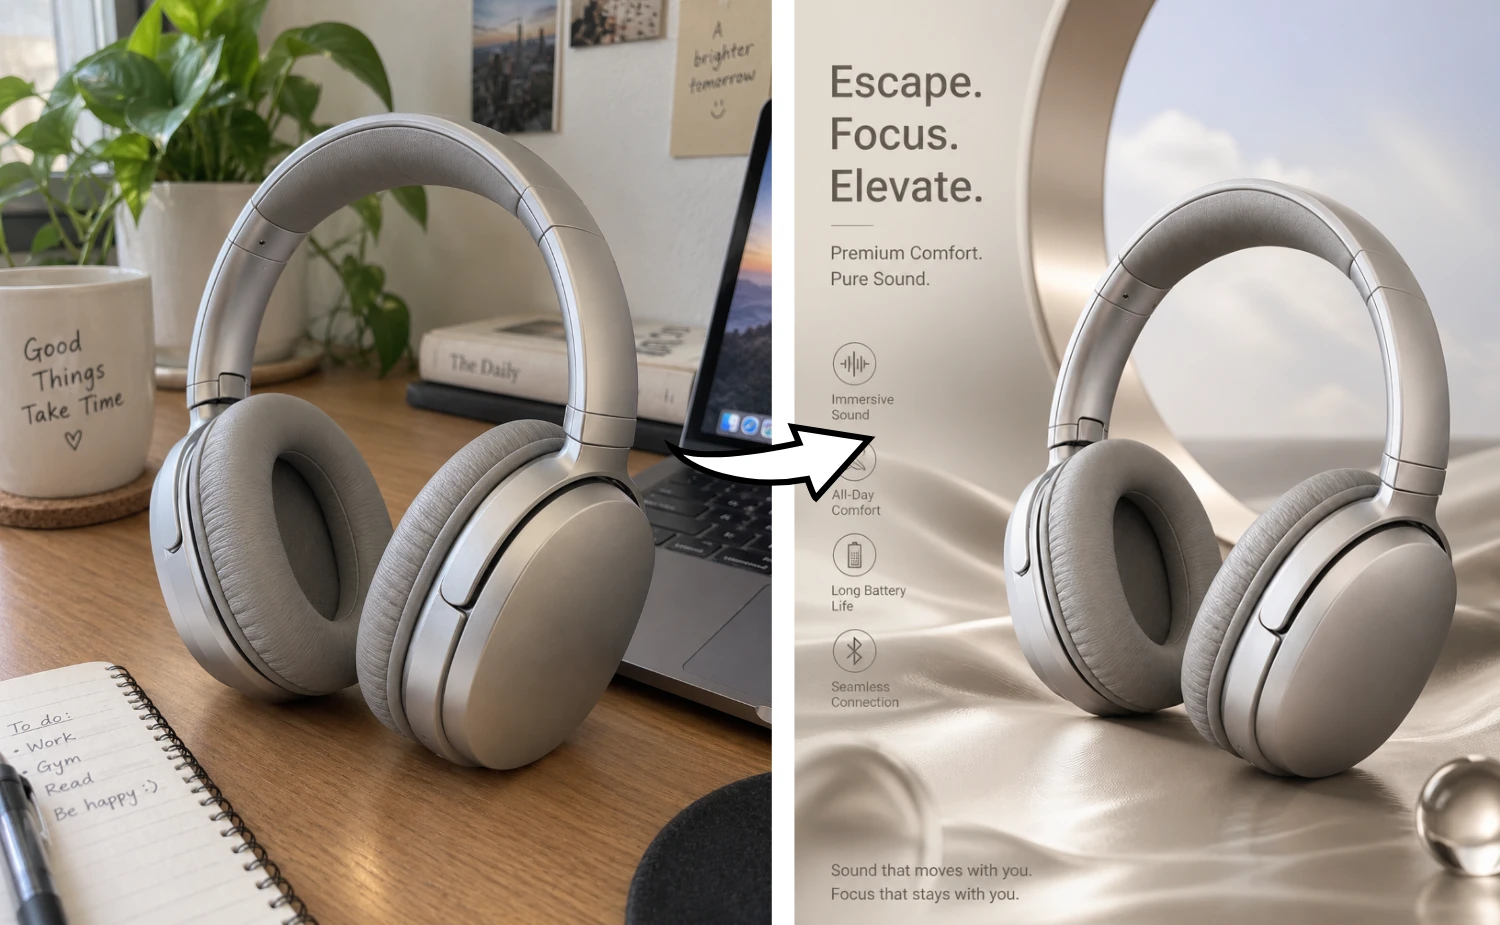
Product Photo → Campaign Visual

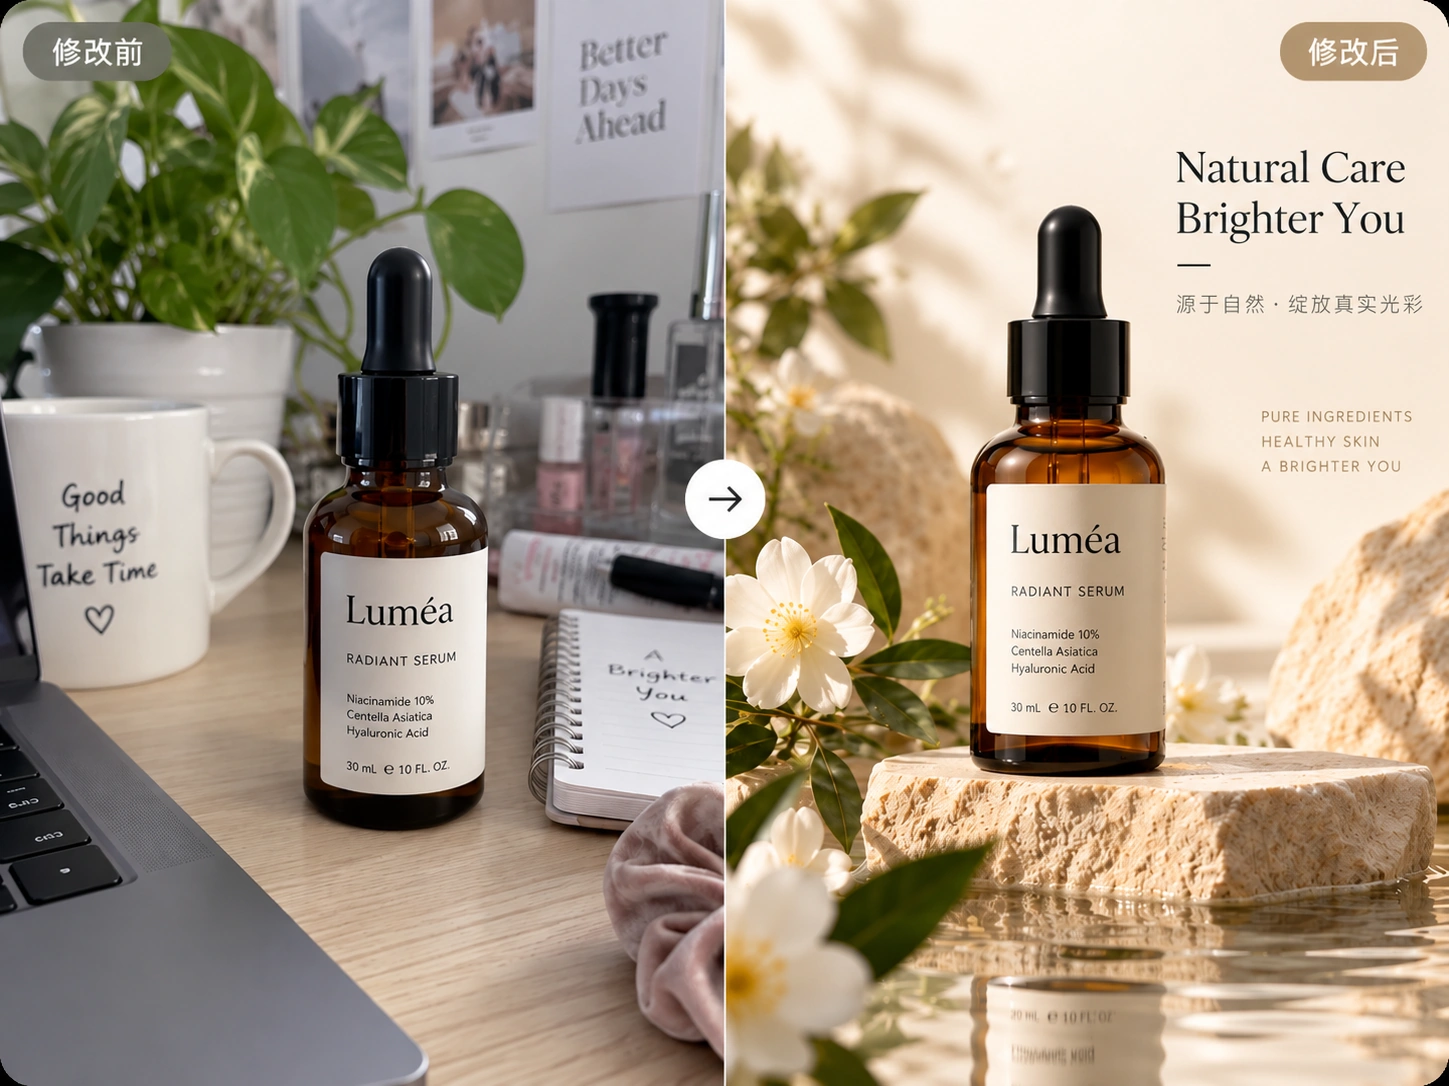
Turn a product photo into a campaign visual with a new scene, polished lighting, and space for your message. Describe the product details that should stay recognizable.

Scene examples

Image to Image AI Use Cases

Explore eight ways to edit a photo or sketch.

Product Photo → Campaign Visual

01

Product Photo → Campaign Visual

Turn a product photo into a campaign visual with a new scene, polished lighting, and space for your message. Describe the product details that should stay recognizable.

Prompt: Transform this ordinary product photo into a premium commercial advertising visual with a clear marketing hierarchy and memorable campaign composition. Precisely preserve the product's shape, proportions, color, packaging, and material. Retouch the product to remove dust, fingerprints, and flaws while improving dimensionality, highlights, and fine detail. Remove the original background and unrelated elements. Match a creative advertising scene to the product category, function, material, and brand character. Use suitable light, liquid, splashes, smoke, glass, metal, geometric structures, natural elements, or floating elements to build depth and a strong marketing mood. Keep the product as the visual focus with an elevated composition, clear layers, and intentional negative space. Make it feel like an international brand campaign key visual rather than a basic product photo or simple background swap. Premium commercial lighting, photorealistic, detailed, modern, refined, visually striking, 8K.
Skincare Photo → Luxury Ad

02

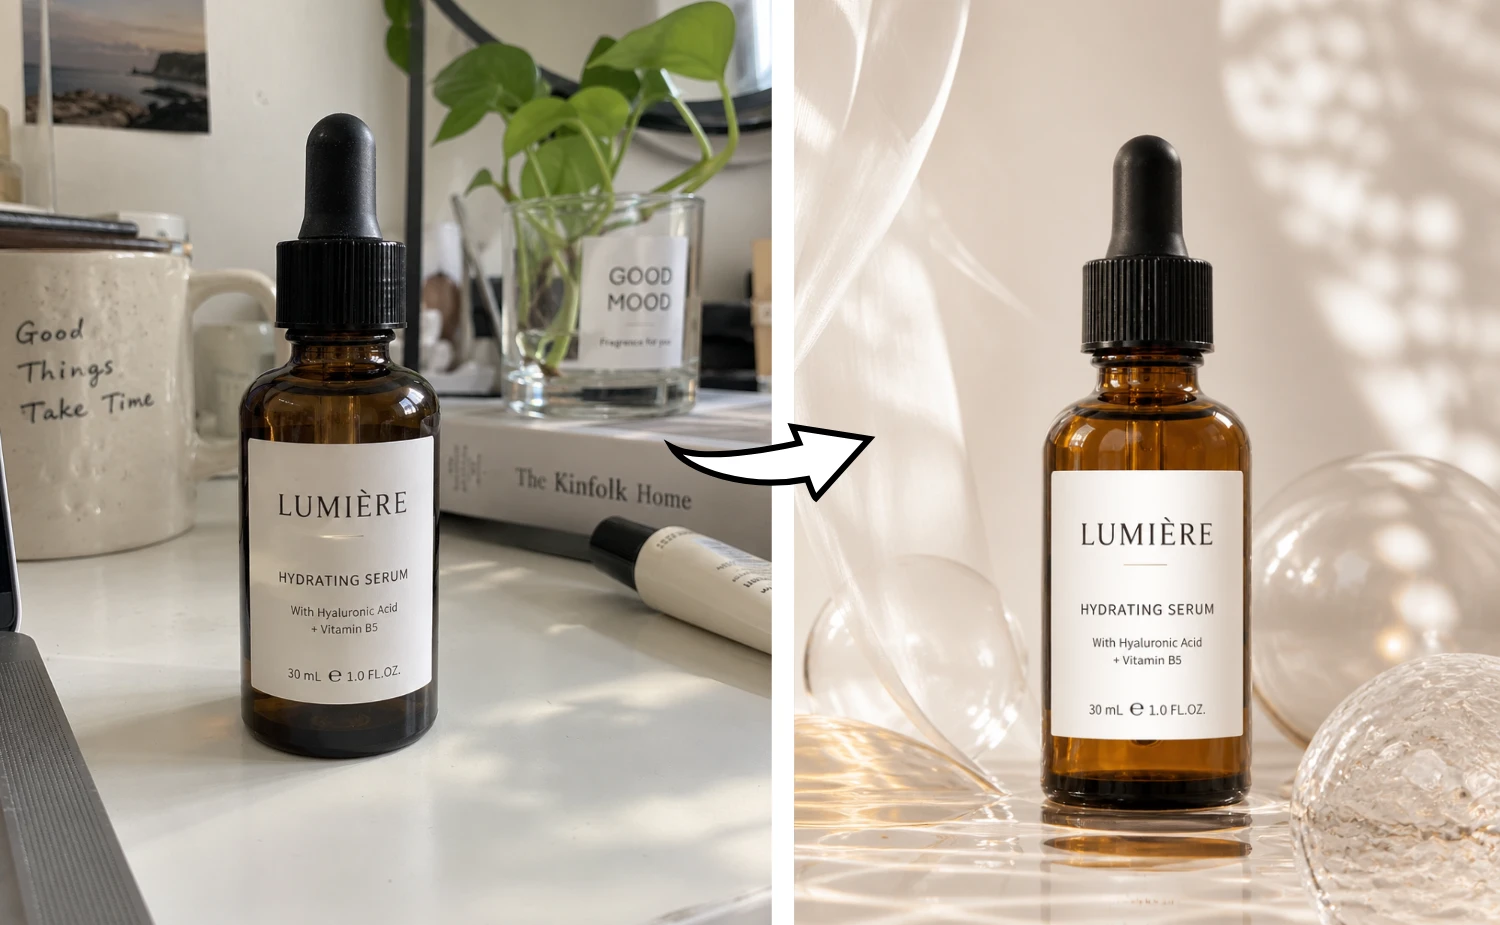
Skincare Photo → Luxury Ad

Give a skincare photo a luxury advertising treatment with refined reflections, clean packaging, and an editorial composition. Check label details after generating.

Prompt: Transform this ordinary product photo into a luxury skincare brand campaign photograph. Retouch the product and remove unrelated elements. Use a straight-on, eye-level view and a refined 3D-rendered product presentation. Precisely preserve the product color, packaging, and material qualities, including transparent glass, matte plastic, or polished metal. Remove every fingerprint, speck, and flaw so the product looks new, dimensional, and premium. Keep the label and all visible text sharp and legible. Use soft, even light with dramatic luxury beauty accents, wet reflective surfaces, a fresh skincare atmosphere, and an editorial campaign composition. Make it a photorealistic, high-end cosmetic product render with modern advertising typography, glossy highlights, and studio campaign quality in 8K.

Room Photo → Interior Render

03

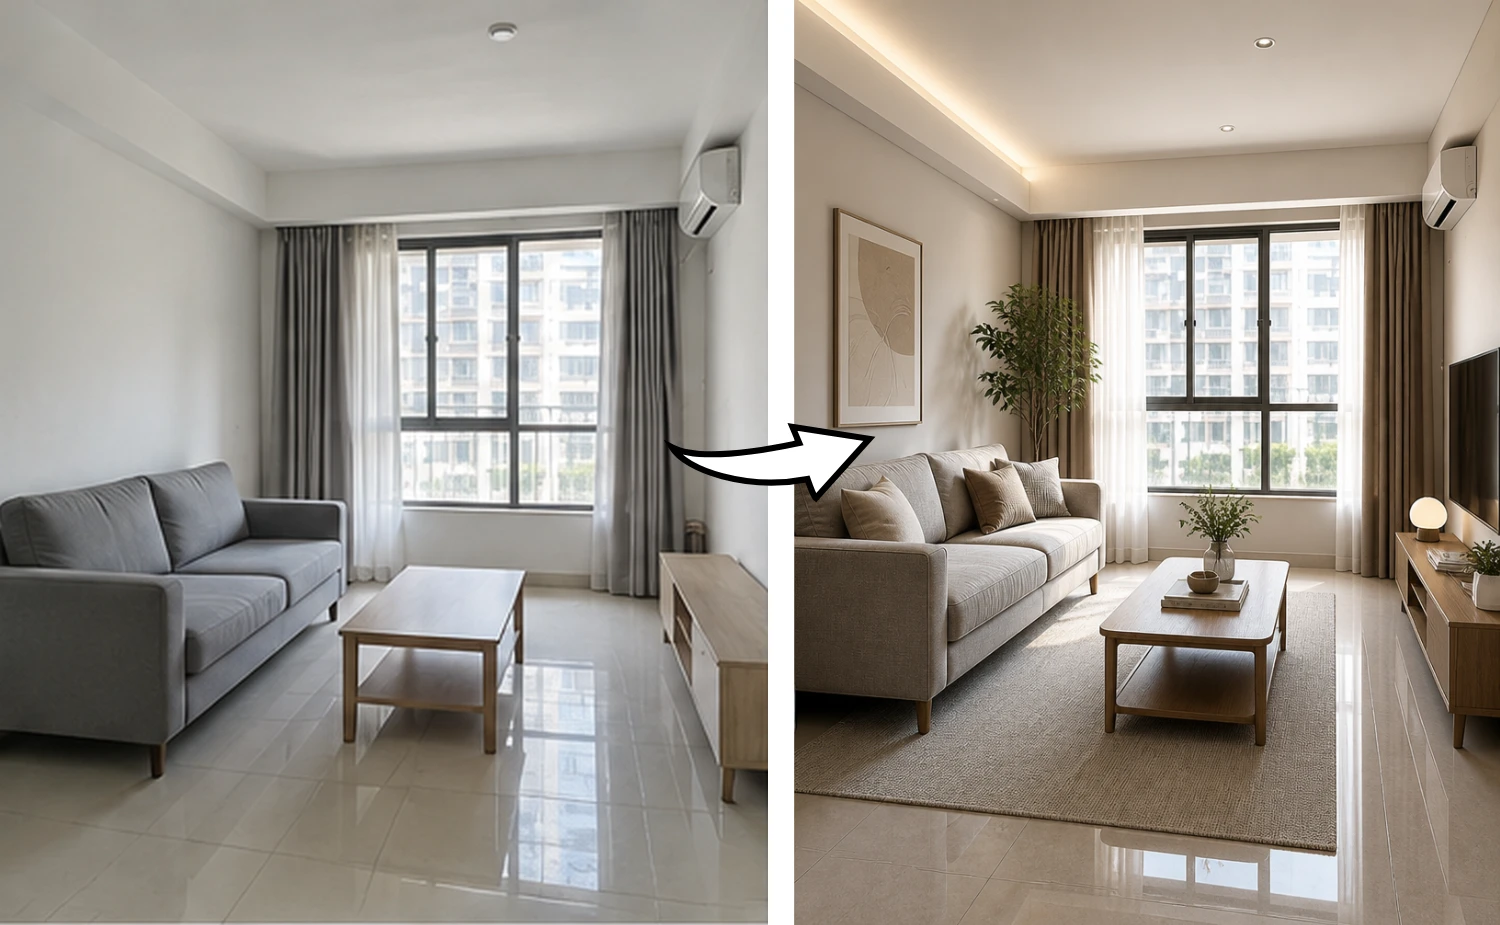
Room Photo → Interior Render

Explore a new interior style from a room photo. Describe the furniture, materials, and lighting you want while keeping the room layout as a reference.

Prompt: Transform this ordinary interior photo into a high-quality interior design visualization. Preserve the room structure, walls, doors, windows, proportions, and camera viewpoint without changing the floor plan. Remove the cluttered furniture and decor, then redesign the furniture, materials, lighting, soft furnishings, and decorations to match a suitable modern interior style. Keep the space coordinated, practical, and designed with intention. Pay attention to material texture, natural light, layered lighting, atmosphere, realistic furniture scale, and a clean premium finish. Make the result feel like a photorealistic renovation visualization created by a professional interior designer.

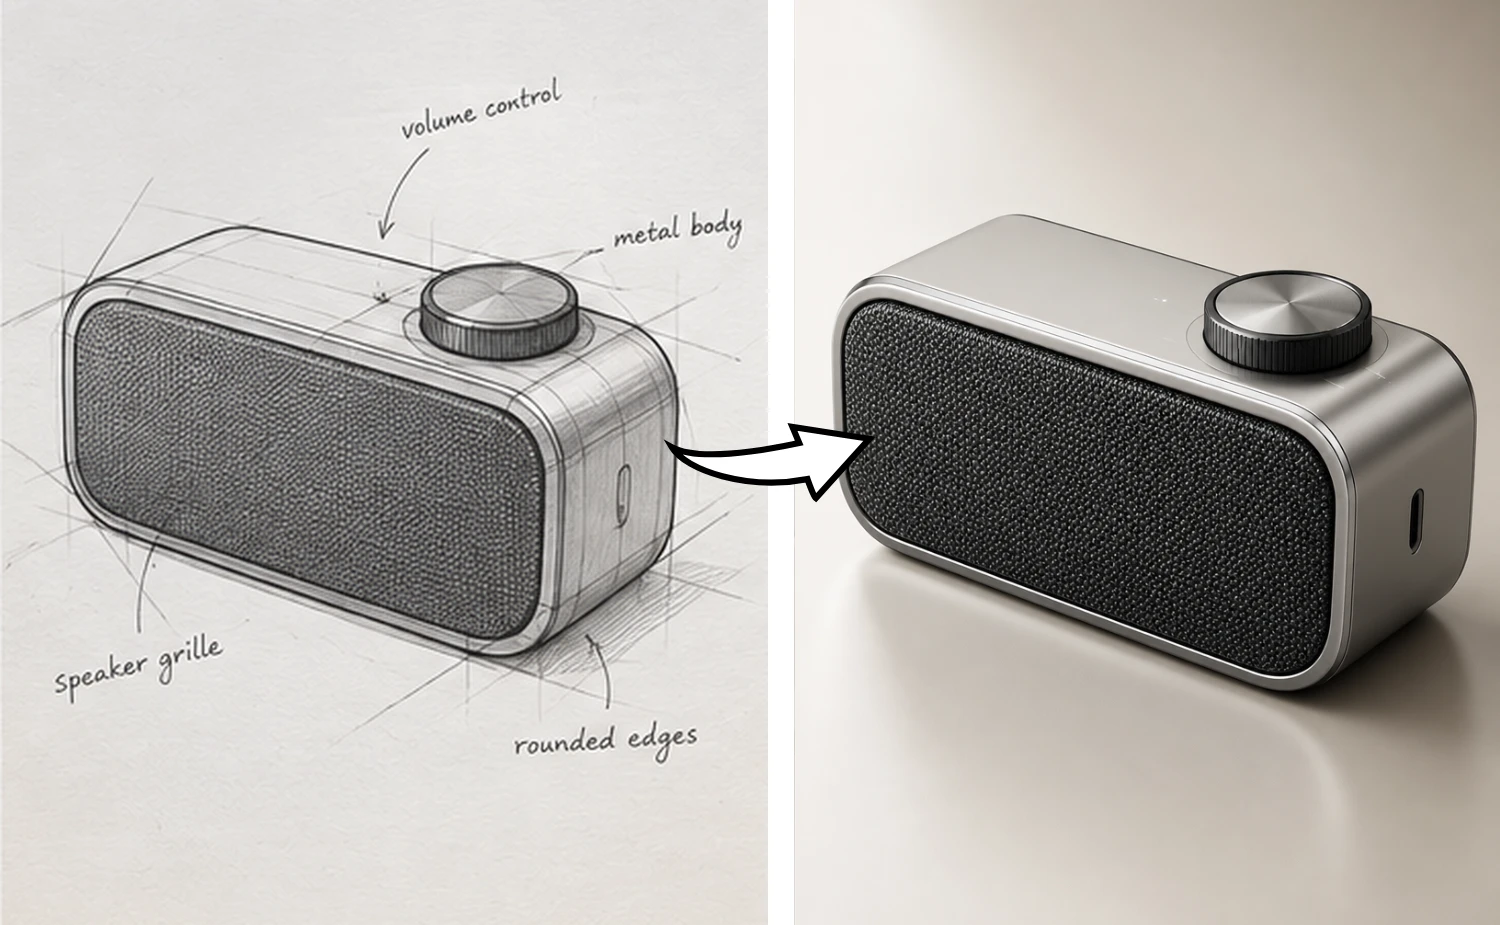
Product Sketch → Product Render

04

Product Sketch → Product Render

Develop a product sketch into a realistic render. Specify materials and lighting while using the original shape and proportions as your design reference.

Prompt: Transform this product sketch into a high-quality realistic product render. Preserve the sketch's core form, structure, proportions, key details, and viewpoint without changing the underlying design. Convert the hand-drawn concept into a realistic, buildable product with appropriate materials, craftsmanship, colors, and detail. Make the product complete, clean, and refined. Render metal, glass, plastic, leather, and other materials with clear, natural texture. Use professional lighting to strengthen dimensionality, light and shadow, and fine detail. Keep the composition simple and premium, like a professional industrial design render or commercial product presentation. Photorealistic, detailed, realistic materials, natural light, elevated finish.

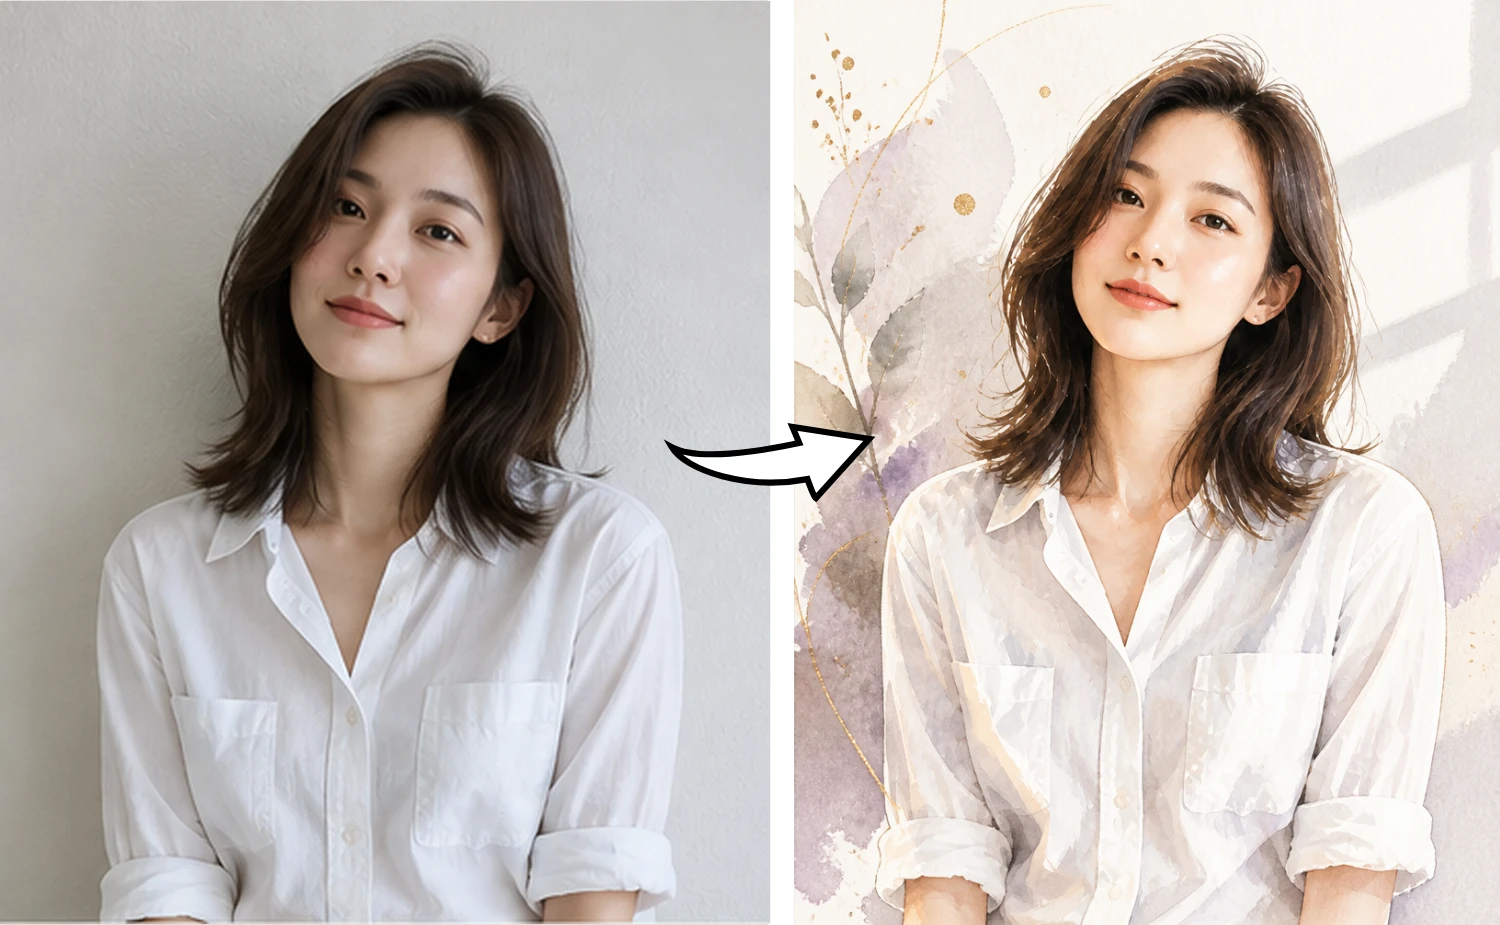
Image to Art AI: Portrait → Watercolor

05

Image to Art AI: Portrait → Watercolor

Use image to art AI to reinterpret a portrait as a watercolor illustration. Describe the colors, brushwork, and mood you want, along with the facial details you want to preserve.

Prompt: Transform this portrait into a refined, fashion-forward editorial illustration. Use an elegant watercolor illustration style with flowing lines, rich yet sophisticated color, soft tonal harmony, delicate light and shadow, and a polished art direction. Add a simple background and a few restrained artistic details to strengthen the mood. The final image should feel like a high-quality fashion magazine illustration: graceful, refined, and beautifully designed.

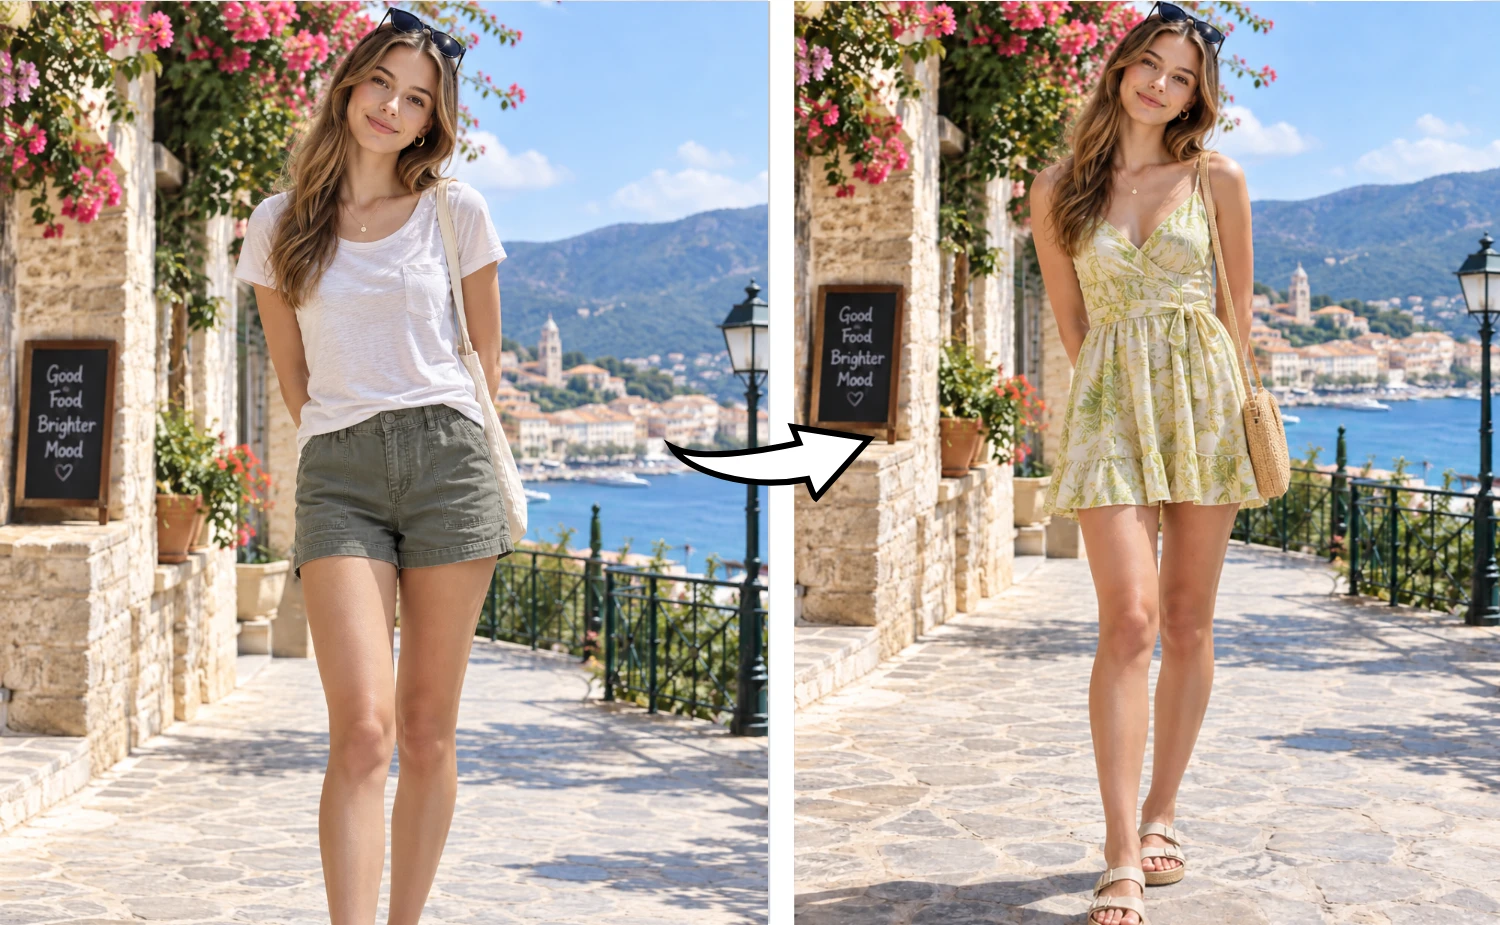
Outfit Photo → Summer Dress

06

Outfit Photo → Summer Dress

Try a fresh summer outfit while using the person and setting as references. Describe the dress colors and accessories, then review facial and pose details.

Prompt: Change the person's outfit to a fresh, energetic summer beach dress in green and yellow. Keep the person's facial features, hairstyle, body proportions, standing pose, expression, and the original outdoor setting unchanged. Only change the clothing and accessories. Make the styling fashionable, polished, and natural, like a young woman's street-style look. Add suitable summer fashion pieces and simple accessories for a relaxed, tasteful finish.

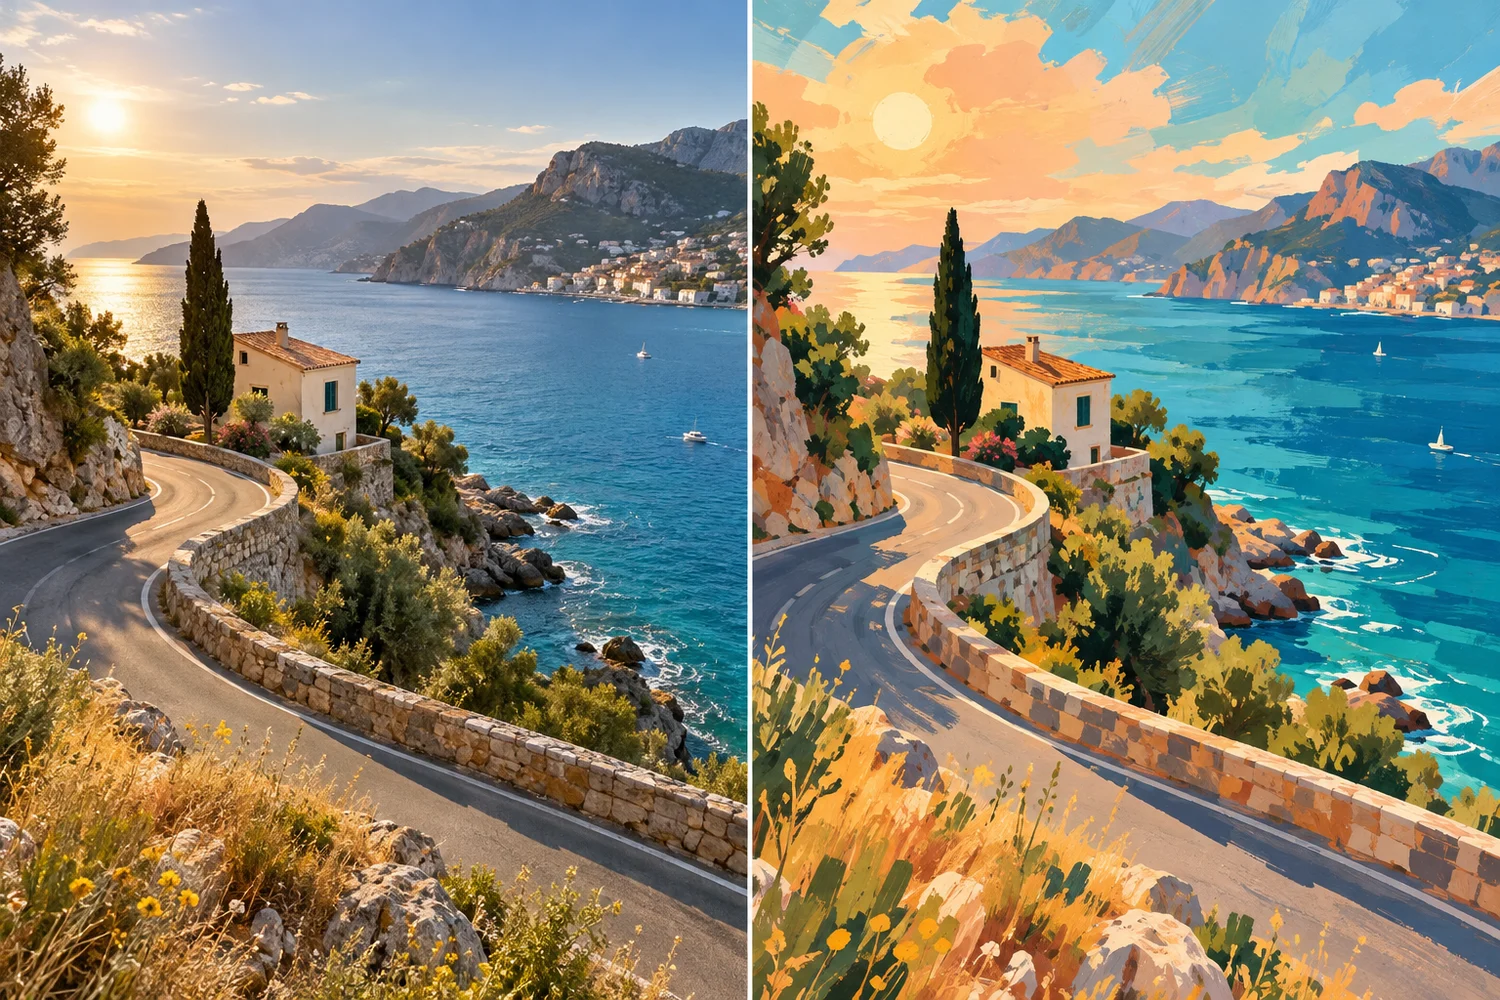
Image to Digital Art AI: Photo → Illustration

07

Image to Digital Art AI: Photo → Illustration

Explore image to digital art AI with a coastal photo reimagined as a painterly illustration. Specify the palette, texture, and landmarks to retain. AI-generated illustrative comparison.

Prompt: Transform this coastal photograph into a painterly digital illustration. Preserve the winding road, house, cypress tree, coastline, camera viewpoint, and overall composition. Use expressive textured brushwork, bold color shapes, turquoise sea, and warm peach and terracotta highlights. Keep the landmarks recognizable while giving the scene a polished editorial illustration style.

Watermarked Photo → Clean Image

08

Watermarked Photo → Clean Image

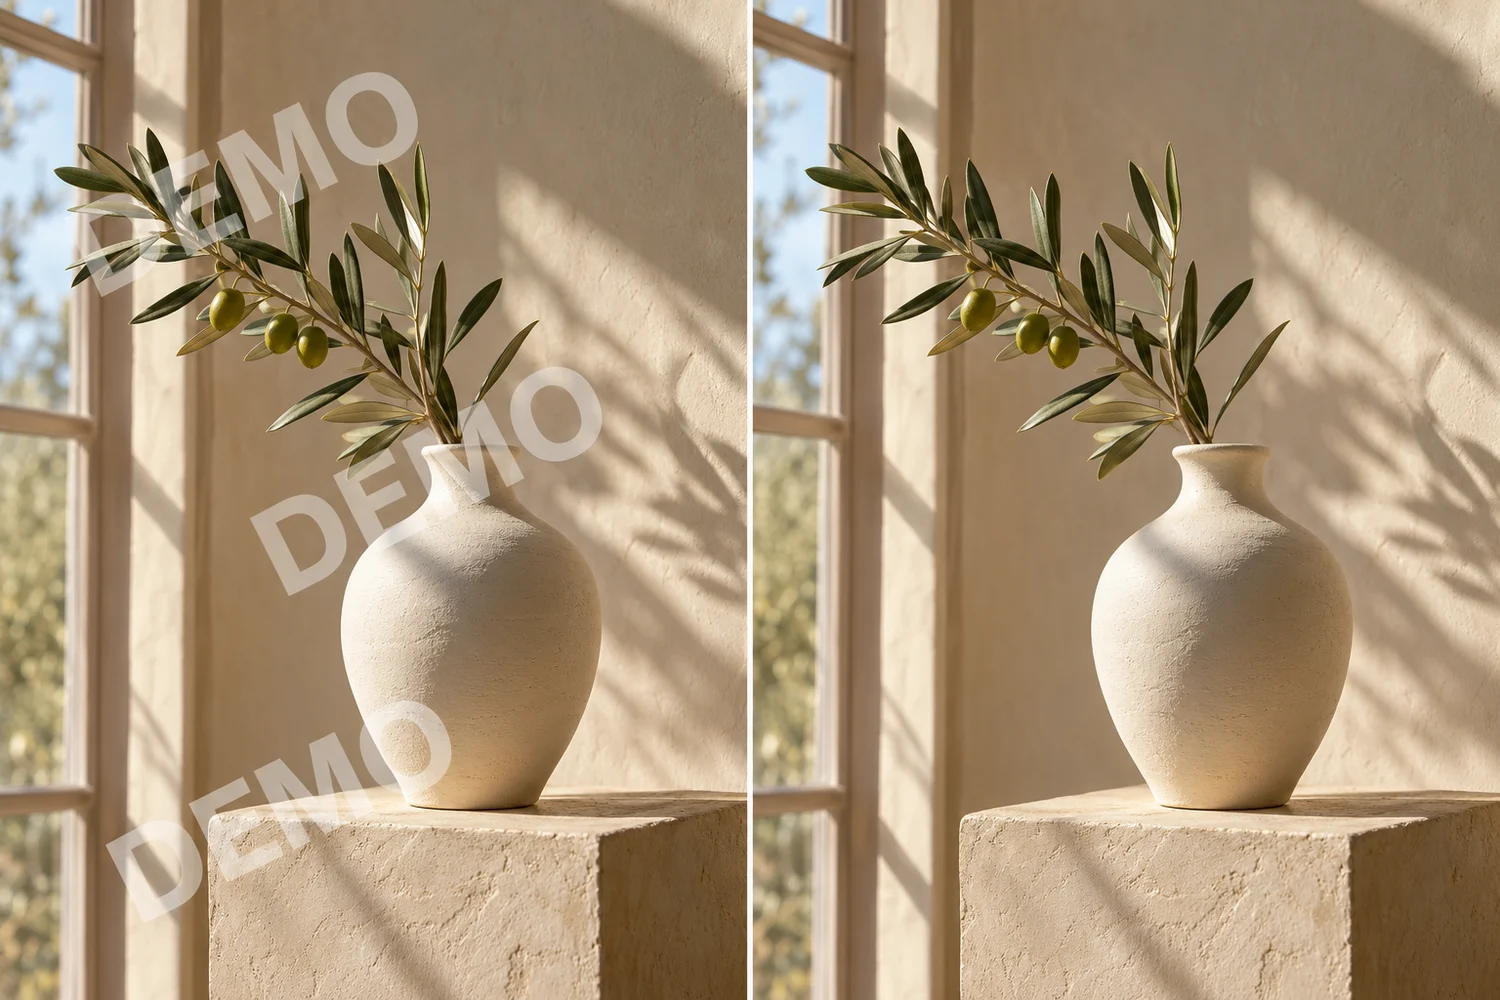
Remove the DEMO overlays from this sample image while asking the model to preserve the vase, leaves, lighting, and composition. AI-generated illustrative comparison.

Prompt: Remove only the semi-transparent DEMO watermarks from this sample image. Reconstruct the covered ceramic, leaves, plaster, and shadows naturally. Keep the vase shape, olive branch, window, lighting, camera viewpoint, colors, and composition unchanged. Do not add text or new objects.

Edit with a reference

Why Use an Image to Image AI Generator?

An image to image AI generator lets you build on a photo or sketch instead of starting from scratch. Describe what you want to change, from the background and lighting to the overall style.

Prompt-guidedPrecise editsKeep iterating
Before and after skincare image editing example

Controlled Edits with Img to Img AI

With img to img AI, describe both the change you want and the subject details you want to keep. Check the result for changes to faces, labels, and proportions.

Refine Your Result with Img to Image AI

Use img to image AI to refine a result with another focused instruction. Adjust one visible detail at a time so you can compare each version with your reference.

How it works

Image to image vs. text to image

Image to image AI starts with a visual reference. Text to image starts with a prompt, so it is better suited to creating a new direction from scratch.

Create from scratch with AI Image Generator
Comparison of image to image and text to image workflows
WorkflowImage to imageText to image
Starts from an existing imageSupportedNot typical
Can guide composition and subjectSupportedNot typical
Supports prompt-based directionSupportedSupported
Best for controlled revisionsSupportedNot typical

Three simple steps

How to Use Image to Image AI

Upload a reference, describe your edit, and choose your output settings. Review the result, then refine your prompt for the next version.

01

Upload an image

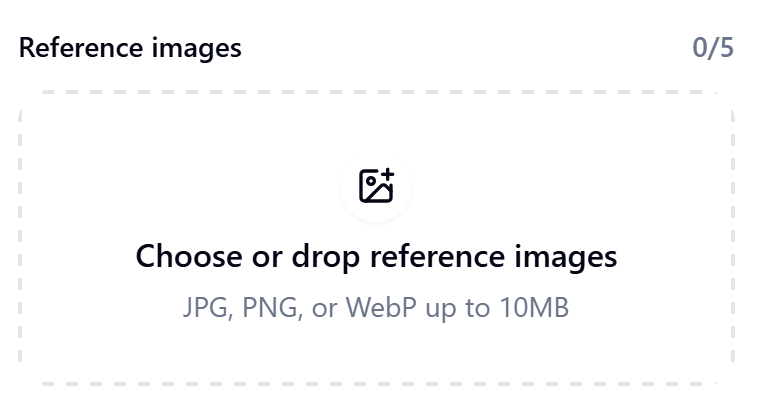
Add one or more JPG, PNG, or WebP references.

Interface screenshot · Upload an image
Upload an image interface screenshot
02

Describe the change

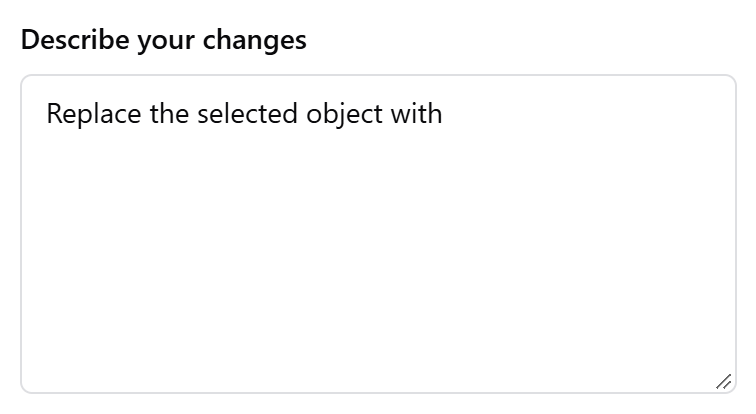
Say what should change and what the model should use as a reference.

Interface screenshot · Describe the change
Describe the change interface screenshot
03

Generate and refine

Choose the ratio, resolution, and quality, then review the result.

Interface screenshot · Generate and refine
Generate and refine interface screenshot

Prompt tips

Write clear image editing prompts

Use a short, visible change and name the details that matter. With multiple references, identify the primary image and the supporting references.

Keep the face, pose, and camera angle unchanged.

Useful for portraits and controlled variations.

Use image 1 for the product and image 2 for the scene.

Useful when combining subject and setting references.

Change one visible decision at a time.

Review before and after results before adding another change.

Looking for Free Image to Image AI?

Looking for free image to image AI? Sign up to receive free credits and try editing your own photos. Each generation uses credits, and the Generate button shows the cost before you start.

FAQ

Image to image AI FAQ

What is Image2Image (img2img)?

Image2Image, also called image-to-image or img2img, starts with an existing image rather than text alone. Upload a reference and describe the changes you want in plain language.

How does Image to Image AI work?

Upload your reference images and describe what to change and what to keep. GPT Image 2.5 Flare uses the images and your instructions to create a new version.

Do I need special prompt syntax?

No. Describe the change in plain language. Short, specific instructions usually give the model a clearer edit target.

Can I preserve the composition?

Describe the composition, subject, pose, or lighting you want to keep in your prompt. These instructions guide the model but do not guarantee identical pixels; check the result for detail changes.

Which image formats are supported?

Each reference image can be a JPG, PNG, or WebP file up to 10MB.

How many reference images can I add?

The number of reference images follows your account entitlement: up to 3 for standard accounts, 5 for accounts with purchased credits or Creator plans, and 16 for Pro plans. The first image is the primary edit target.

Can I choose the output resolution and quality?

Choose a resolution and quality combination in Output settings: 1K, 2K, or 4K with Low, Med, High, X-High, or Max quality. Settings above 1K Low require purchased credits or an active subscription.

How many credits does an edit use?

The Generate button shows the current cost for your resolution, quality, and number of reference images. Higher output settings and additional references can cost more.

Are my reference images private?

Reference images are submitted when you generate. Your references and generated results are stored privately and are not automatically published to the community.

Can I use the result commercially?

Commercial use follows the model and account terms that apply to your Designhint generation. Review the current terms before publishing client work.

What are the current editing limitations?

Editing is prompt-based and does not include masks, local brush editing, batch generation, or a pixel-lock guarantee. You can add multiple reference images when your account plan allows it.

Start with an image you already like.

Make the next change deliberate, then keep iterating from the result.